My Step-by-Step Journey to Improving My Airway and Oral Health
- Melinda Rogers

- Nov 27, 2024
- 5 min read
Updated: Dec 2, 2024

After realizing I had been diagnosed with Obstructive Sleep Apnea (OSA) and an Orofacial Myofunctional Disorder, I came to the crucial understanding that I needed to take decisive action to improve my health and overall quality of life. My husband had been using a Continuous Positive Airway Pressure (CPAP) machine for his own sleep apnea treatment, and while I recognized the effectiveness of this device, I felt compelled to explore alternative treatment options that might better suit my personal preferences and lifestyle. I wanted to ensure that I was taking a holistic approach to my health, considering various strategies that could alleviate my symptoms and enhance my sleep quality. Here’s a detailed account of how I tackled my journey, step by step:
Step 1: Addressing My Allergies
The primary lesson in OMD training is prioritizing the airway! This is where my journey began. I dealt with persistent nasal congestion and relied on several allergy medications that were becoming less effective. I underwent allergy testing and discovered I was severely allergic to cats, dogs, pollen, grass, trees, dust, and mold. As a result, I began receiving allergy shots. After three years of treatment, I can now breathe through my nose and only need to take medications occasionally.
Step 2: Undergoing a Thorough Evaluation by an
Airway Focused Dentist
In my Orofacial Myology training, I learned about The Breathe Institute and Dr. Soroush Zaghi MD, who offers comprehensive training to dentists and other dental professionals in addressing airway and dental issues. This led me to my dentist, who conducted a detailed assessment of my mouth and airway. The assessment included:
A comprehensive examination of oral and tethered oral tissues
A CBCT (Cone Beam Computed Tomography) that captured images of my mouth, throat, and nasal cavity from various angles
A Sleep Study
Postural Photographs
Step 3: Learning about my Diagnosis and Choosing the Optimal Treatment Plan
My dentist reviewed my X-rays and diagnostic results with me, which included:
Mild obstructive sleep apnea
Narrow palate with an intermolar bony width of 29 mm (healthy range is 38-45)
Moderate crowding of both upper and lower teeth
Posterior crossbite
Deep bite
Ankyloglossia (tongue and lip, Grade 3)
Deviated septum
Compromised nasal turbinate
Compromised Temporomandibular Joint (TMJ) with popping and deviation to the right
Hypoplastic maxilla leading to posteriorly displaced TMJs on both sides
Airway restriction due to posterior soft tissue displacement
The sleep study results, revealing mild sleep apnea, were very eye-opening. Given my airway issues and the risk of them worsening with age, I decided to focus on airway expansion before aligning my teeth. Although surgery was an option, I opted for gradual expansion using a DNA appliance (Daytime-Nighttime Appliance), a removable, custom-made dental device approved for treating sleep apnea and TMJ disorders.
My treatment plan consisted of:
Maxillary/Mandibular Expansion
Nasal Hygiene
Breathing Exercises
Orofacial Myofunctional Therapy (also known as Myo)
Guided Frenuloplasty of the tongue and upper/lower lips (also known as tongue and lip tie releases)
Clear Aligners using CANDID Pro expansion protocol
Step 4: Starting the Expansion Process

In the 1970s, a typical approach in dentistry and orthodontics was to extract teeth in cases of overcrowding and to retract teeth to address an overjet malocclusion. My current dentist wanted to do the opposite, expand the jaws out and foward to make more space for my tongue and expand my airway. So, I was fitted with a custom oral appliance that I was to wear 14 hours a day and adjust with a key on a regular schedule, as guided by my dentist. In addition, I used a VPro5 device twice a day to stimulate bone growth.
Step 5: Participating in Orofacial Myofunctional Therapy
Even though I had training in OMT, I was encouraged not to be my own therapist so that I can learn from another professional and be held accountable for follwoing through with the therapy recommendations. My Myo therapist helped me by:
Expanding my knowledge of breathing, tongue-ties, and oral health. Here are some of the books I've read:
Encouraging me to establish a routine for nasal hygiene beyond just blowing my nose. Here are the products I use regularly:
Improving my capacity for diaphragmatic breathing and decrease my breathing rate.
Showing me how to strengthen my tongue, establish proper tongue-resting postures through daily exercises, and balance my chewing patterns when eating to reduce my jaw discomfort.
Optimizing my oral musculature prior to my frenuloplasty (tongue-tie release).
Step 6: Consult with Bodywork Professionals
A bodyworker, such as an osteopath, physical therapist, or chiropractor, is essential before a tongue tie release, as they assess and relieve muscle and fascia tension, preparing the body for the procedure. Following the release, they support healing and prevent the frenulum from reattaching through ongoing therapy. Given my history of neck and shoulder problems, my dentist suggested a guided release with an osteopath present during the dental procedure. The osteopath assisted in guiding the dentist to ensure all tight frenum tissues were addressed. Interestingly, I now seldom experience neck and shoulder issues.
Step 7: Releasing my Tongue and Lip Ties
The effects on function and structure caused by my tethered oral tissues prompted me to seek their release. After allowing enough time for expansion to create more space for my tongue, the dentist confirmed my readiness for the procedure. Approval from the Myo therapist was also required to ensure optimal results. This procedure, referred to as a frenuloplasty for ankyloglossia, involves the precise detachment of the frenulum, the thin tissue band linking the underside of the tongue to the mouth's floor, thereby allowing improved movement and functionality of the tongue.
before release right after now
Immediate changes in my posture and neck tension post-release
Step 8: Completing my Expansion
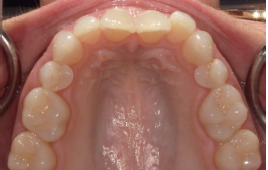
I wore my expansion appliance as instructed, diligently adhering to the recommended schedule of 14 hours a day, which included both daytime and nighttime usage. This commitment was crucial, as it allowed the appliance to effectively perform its function of gradually widening my dental arch. After almost a year, I decided I was happy with my results.


Before Expansion After Expansion with DNA Appliance
Step 9: Teeth Straightening and Expansion
with Clear Aligner Therapy

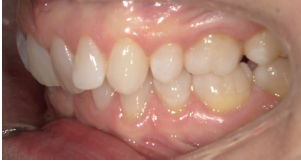
After using a DNA appliance for initial palatal expansion, my dentist transitioned to Candid Pro Clear Aligner Therapy to achieve further expansion, align my bite, and my straighten teeth. They gradually moved the teeth into the desired position, providing a more aesthetic and comfortable treatment option compared to traditional braces.

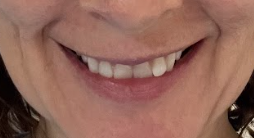
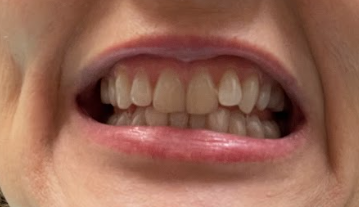
Before Clear Aligner Therapy After

Before my treatment, my airway space was 26.823 cm³, and my minimally restricted area was 142 mm², with anything over 200 mm² being considered good. After treatment, my total airway volume increased to 48.292 cm³, and my minimally restricted area is now an impressive 416 mm². This major improvement shows how effective the treatment was for me in increasing my airway capacity and overall breathing function.
Step 10: Composite Restorations
In my childhood, my premolars were extracted because of a "small mouth." As I've aged, my airway has narrowed, and the removal of these teeth might have been a factor. My dentist used Clear Aligner Therapy to create space in the area where my upper premolars were, aiming to enhance my airway, bite, and jaw movement. The process concluded with composite restoration to fill the gap.
Overall, I am extremely pleased with my results. I can smile confidently, and I no longer exhibit symptoms of sleep apnea. I persist in doing Myo exercises specifically for sleep apnea to maintain strong muscle tone and minimize the risk as I get older. This has been a journey demanding dedication, time, and financial investment, rather than a quick solution. I don't regret any of it.
If you think you experience similar problems as I have, feel free to reach out to me at melinda@traliblazerspeech.com or by calling 972-244-3065.


Comments